The Multi-Agent Reality
The era of working with a single AI coding assistant is already behind us. In 2026, professional developers routinely use two, three, or more AI agents in a single coding session. Claude Code handles complex refactoring. Codex CLI writes boilerplate and tests. Gemini CLI helps with documentation and code review. Amp tackles infrastructure tasks.
Each of these agents runs in a terminal. Each terminal needs to stay open, maintain its scrollback history, and remain accessible while you work on something else. If you are managing this with separate terminal windows or basic tab splits, you already know the problem: it is chaos.
This guide walks through how to set up and manage a multi-agent terminal workspace effectively — from basic parallel execution to full agent orchestration.
The Naive Approach (and Why It Breaks Down)
Most developers start by opening multiple terminal windows or tabs in their existing setup. One tab for Claude Code, another for Codex, another for their dev server. This works when you have two or three terminals. It stops working around five or six.
The problems compound:
- Unnamed tabs look identical. Which terminal has Claude running your backend refactor and which has Codex writing your frontend tests? You have to click into each one to find out.
- No status visibility. Is that agent still thinking, waiting for input, or finished? Without checking each terminal individually, you have no idea.
- Session loss on restart. Close your laptop, and your agent conversations vanish. Tomorrow morning, you spend 15 minutes reconstructing context that your AI agent had already built up.
- Manual context relay. Agent A finishes a task and produces output that Agent B needs. You copy from one terminal and paste into another, becoming a human message bus between your AI tools.
Setting Up a Proper Multi-Agent Workspace
A well-organized multi-agent workspace needs four things: named and color-coded terminals, layout flexibility, session persistence, and some form of agent coordination.
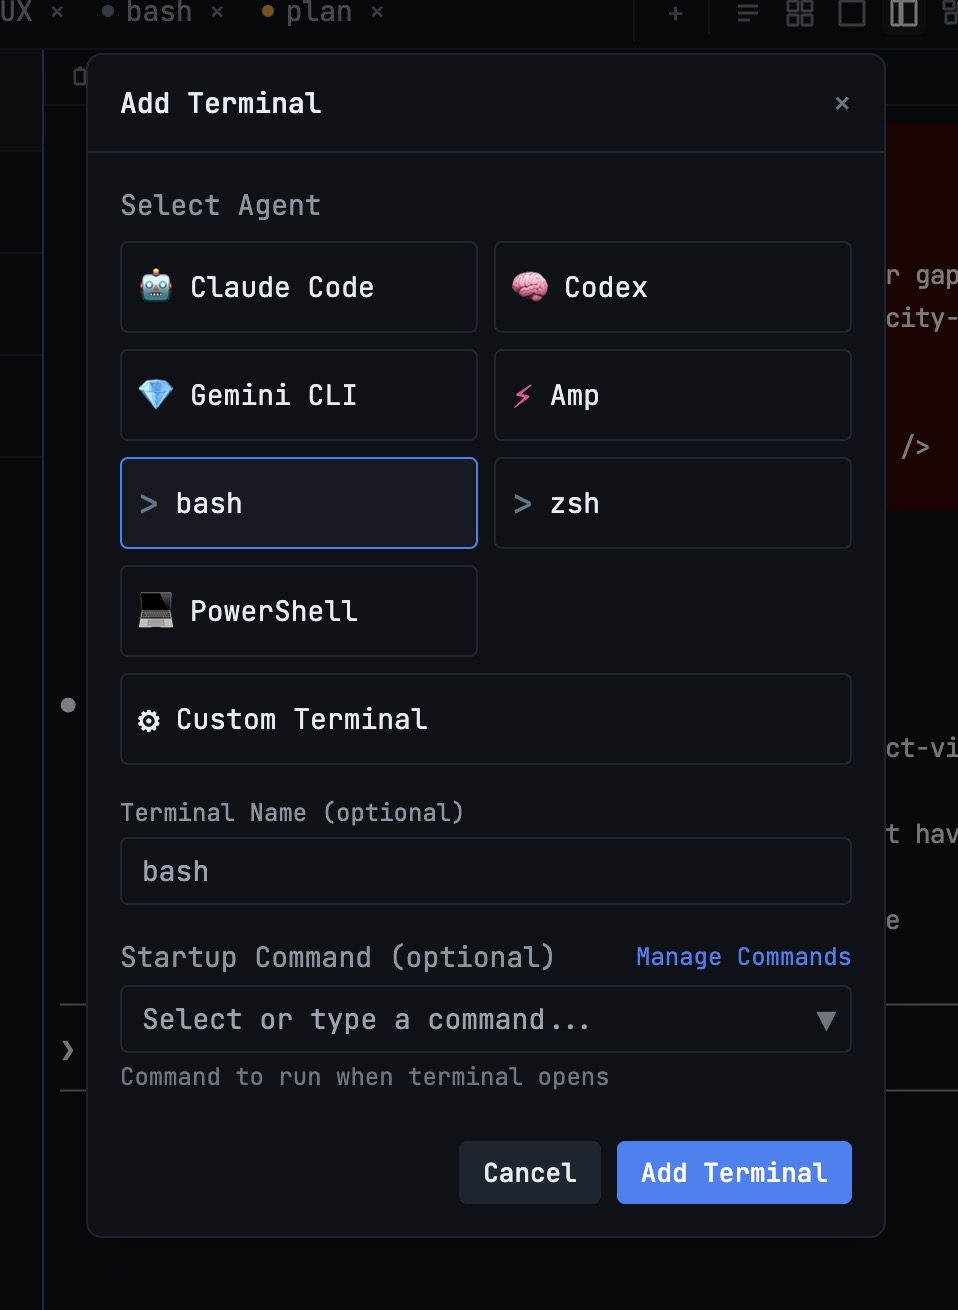
Step 1: Named, Color-Coded Terminals
The first step is giving each terminal an identity. Instead of “Terminal 1” through “Terminal 6,” assign meaningful names and visual indicators:
- Claude Code (Backend) — blue indicator
- Claude Code (Frontend) — purple indicator
- Codex CLI (Tests) — green indicator
- Gemini CLI (Docs) — orange indicator
- Dev Server — white indicator
- Shell — gray indicator
Color coding lets you identify terminals at a glance. You never run a destructive command in the wrong terminal because the visual context is always present.
In 1DevTool, each terminal tab supports custom names, color assignments, and real-time status indicators (Idle, Running, Review) that update automatically based on the agent’s state.
Step 2: Layout Flexibility
Different tasks call for different arrangements. When monitoring multiple agents, a 2x2 grid layout lets you watch all of them simultaneously. When doing deep work in a single agent conversation, a fullscreen single-terminal view removes distractions. When comparing outputs, a side-by-side column layout is ideal.
The key is being able to switch layouts instantly — not spending 30 seconds dragging and resizing panes every time your task changes.
Step 3: Session Persistence
This is non-negotiable for serious multi-agent work. AI agent conversations build up context over the course of a session. Claude Code learns about your codebase structure, the patterns you prefer, the bugs you have already fixed. Losing that context because you restarted your machine is expensive.
Session persistence means:
- Terminal scrollback survives application restarts
- AI agent conversation history is preserved
- You can resume a Claude Code or Codex session exactly where you left off with a single click
- Multiple sessions from the same agent type are tracked independently
1DevTool achieves this through tmux-backed session persistence and agent-specific session detection. Close your laptop on Friday afternoon. Open it Monday morning. Every terminal, every conversation, every scroll position is exactly where you left it.
Step 4: The Terminal Dashboard
Once you are running six or more terminals across multiple projects, you need a bird’s-eye view. A terminal dashboard shows you the status of every terminal in every project without clicking through tabs.
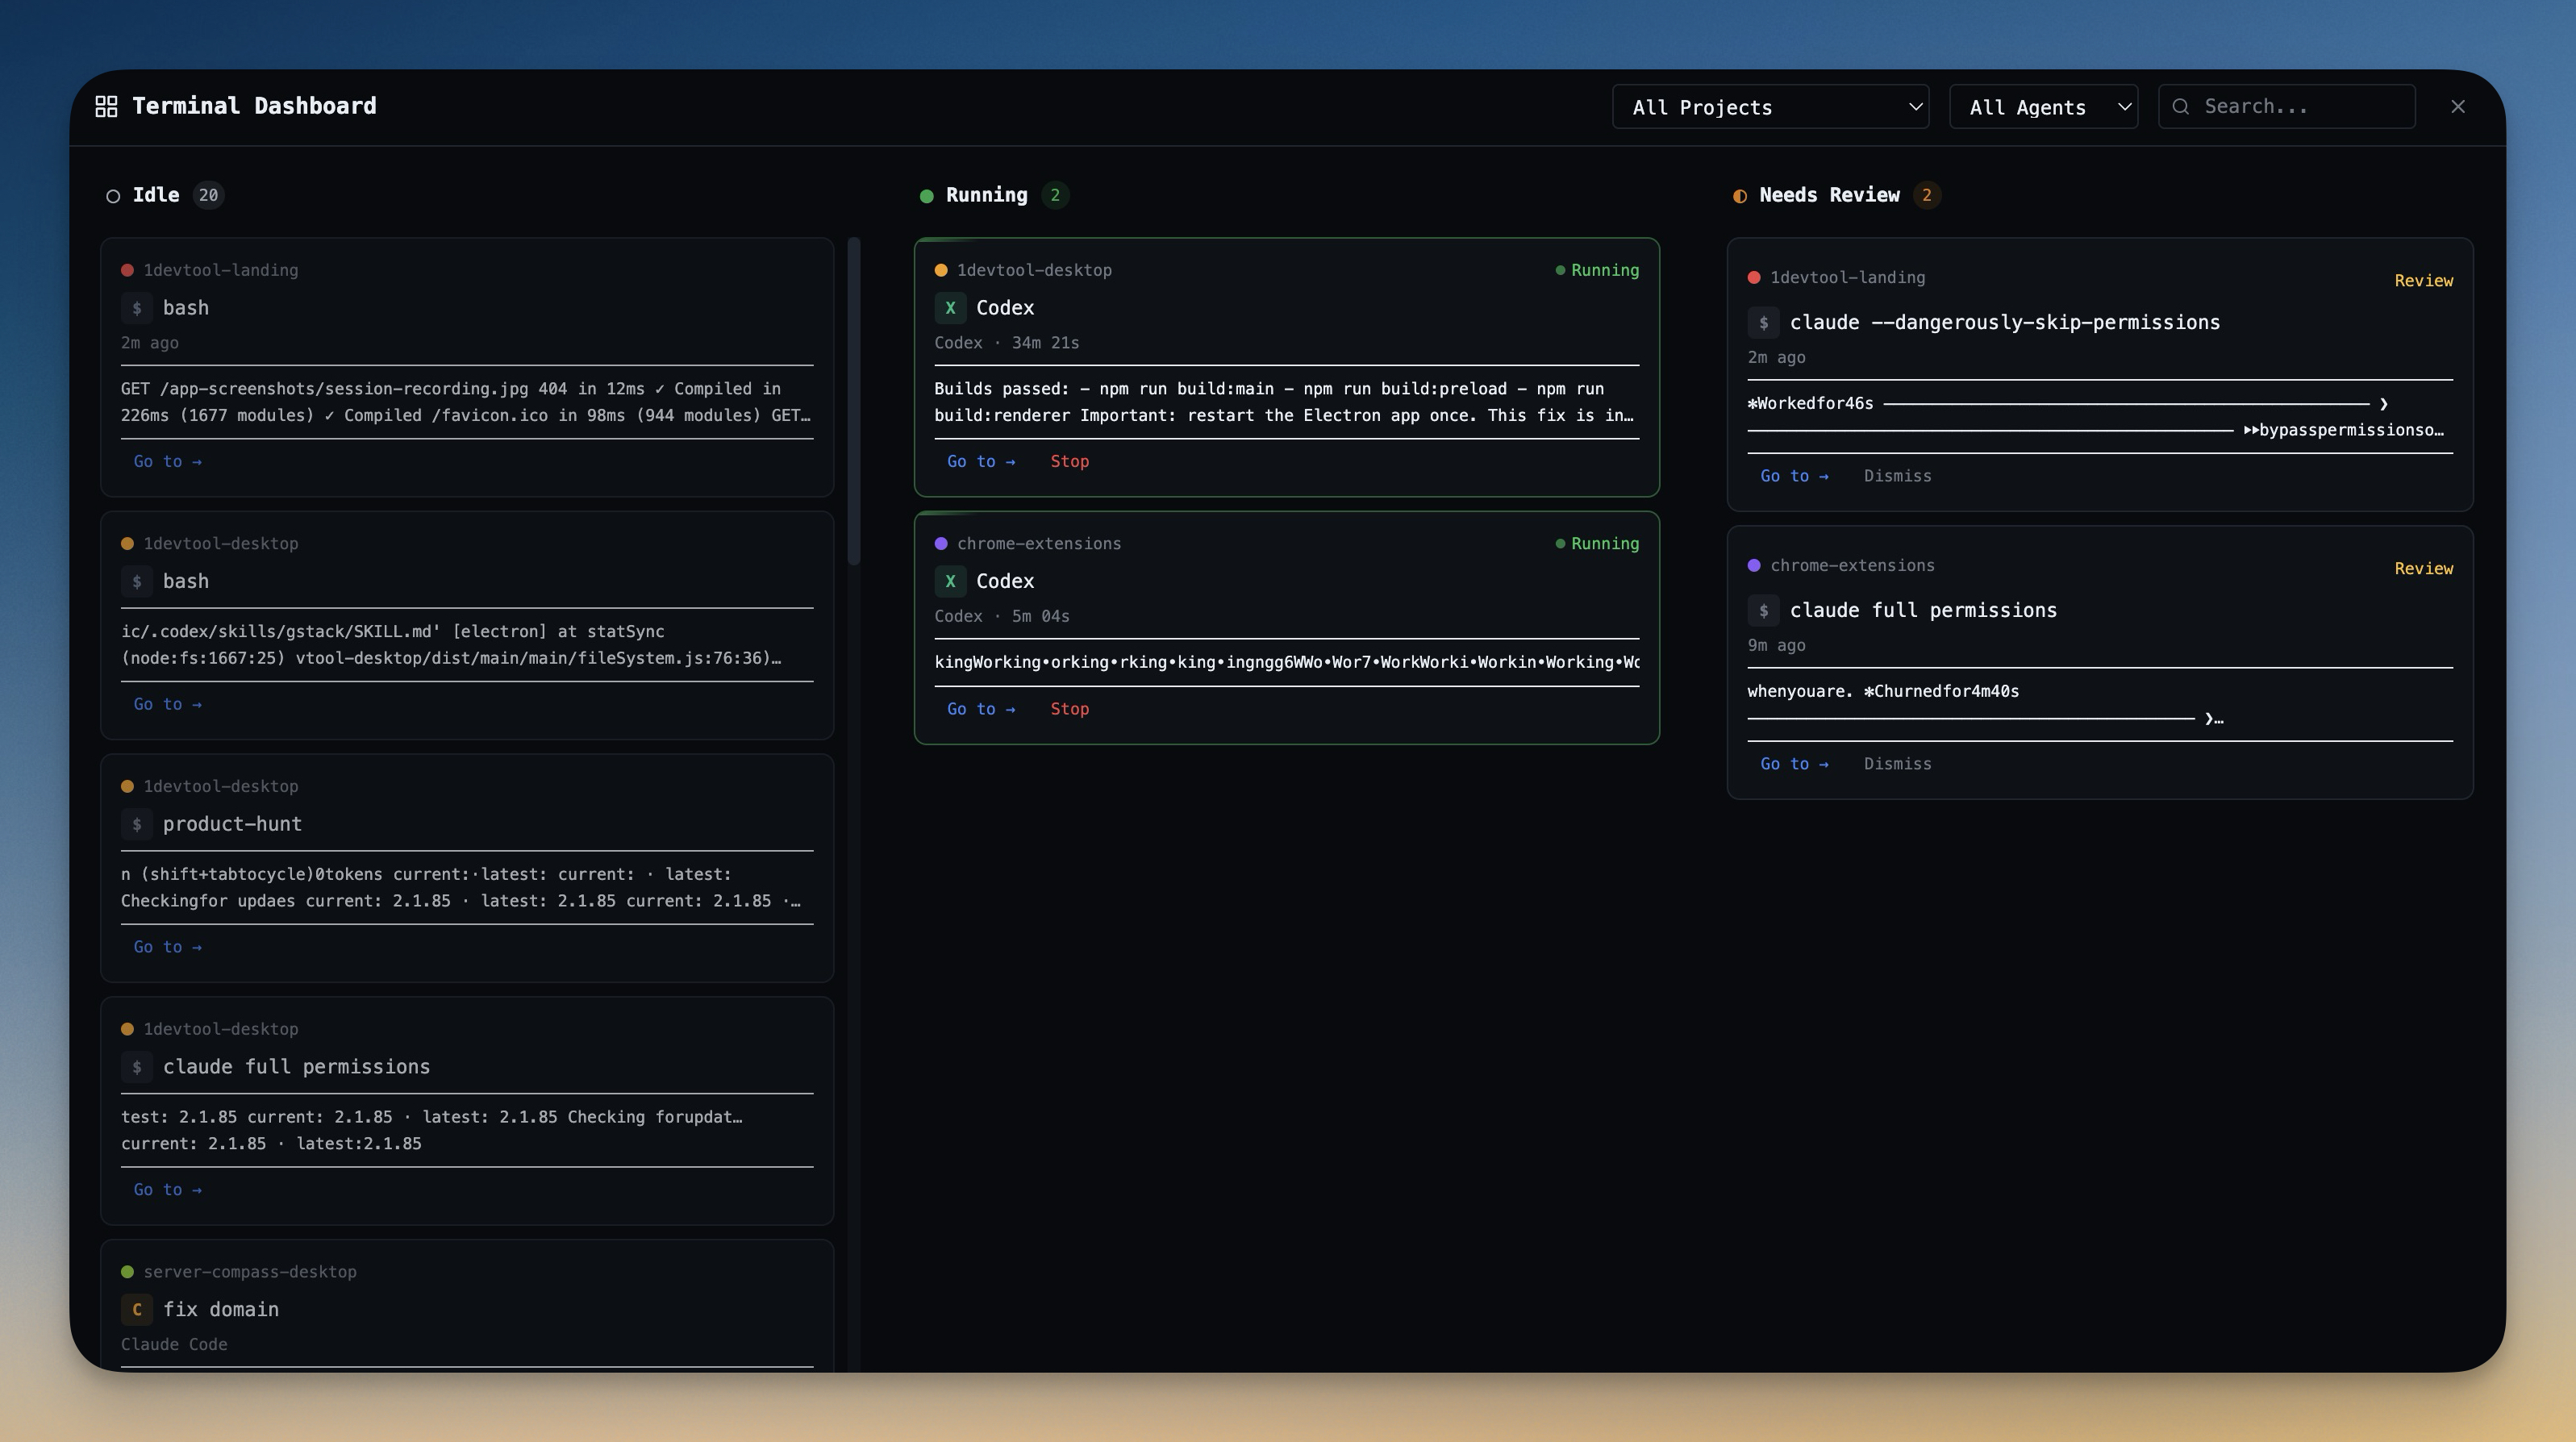
Think of it as a Kanban board for your terminals. Columns for “Idle,” “Running,” and “Needs Review.” At a glance, you know which agents are done, which are still working, and which need your input. This alone saves the 10 to 15 minutes per hour that developers typically waste polling terminal states.
Advanced: Agent Orchestration with Channels
Running agents in parallel is useful. Coordinating them is powerful.
Agent orchestration lets one agent (the “operator”) direct other agents through a shared communication channel. Instead of you manually copying output from Claude Code and pasting it into Codex, an operator agent reads from all terminals and routes information where it needs to go.
Here is how a typical orchestrated workflow looks:
- You create a channel with a task description: “Refactor the payment service to use the new billing API.”
- The operator assigns roles. Claude Code handles the backend refactoring. Codex writes updated tests. Gemini updates the API documentation.
- Agents execute in sequence or parallel depending on the task structure. The operator waits for Claude Code to finish the refactor before telling Codex to write tests against the new code.
- You review the results in the channel conversation log, seeing exactly what each agent did and why.
This pattern — sometimes called agentic coding — turns a collection of independent AI tools into a coordinated team. The developer shifts from writing code to directing a workflow.
Using Channel Templates
Setting up an orchestration workflow from scratch every time is tedious. Templates solve this by providing pre-configured workflows for common tasks:
- Code Review: One agent reviews while another fixes issues found
- Build & Test: One agent implements while another writes and runs tests
- Refactor & Verify: One agent refactors while another verifies nothing broke
- Documentation: One agent generates docs while another reviews for accuracy
Select a template, point it at the relevant files, and the workflow starts immediately.
Pausing and Resuming Workflows
Sometimes an agent goes down the wrong path, or you need to inspect intermediate results before proceeding. The ability to pause an orchestrated workflow mid-execution — without losing context — is critical. Pause, inspect, correct if needed, and resume from exactly where the operator stopped.
Practical Tips for Multi-Agent Development
After working with multi-agent setups extensively, a few patterns consistently improve the experience:
Assign agents to their strengths. Claude Code excels at complex reasoning and large-scale refactoring. Codex is fast at generating boilerplate and tests. Gemini handles documentation and explanation well. Play to each agent’s strengths rather than using one agent for everything.
Use separate terminals for separate tasks. Do not reuse a terminal that finished a backend task for a frontend task. The accumulated context helps the agent, but only if the context is relevant. Start a fresh terminal for unrelated work.
Keep a general-purpose shell terminal. Not everything needs an AI agent. Quick git commands, npm installs, and file operations are faster in a plain shell. Reserve your agent terminals for tasks that benefit from AI assistance.
Review agent output before moving on. Multi-agent workflows move fast. It is tempting to let all agents run and review everything at the end. But catching a wrong assumption early — when only one agent has acted on it — is much cheaper than catching it after three agents have built on top of it.
Leverage prompt history. When you find a prompt that works well — one that makes Claude Code produce exactly the refactoring pattern you want — save it. Good prompts are reusable assets. A searchable prompt history turns your best interactions into a personal library.
Getting Started
If you are currently managing AI agents in separate terminal windows, the transition to a unified workspace is straightforward. Install a tool that supports multi-agent terminal management, create named terminals for each agent, and start running your agents as usual. The organizational layer is additive — it does not change how the agents themselves work.
1DevTool was built specifically for this workflow. Multi-agent terminals with color coding, a Kanban dashboard, channel-based orchestration, session persistence, and one-click resume are all included for a one-time $29 payment. It runs on macOS, Windows, and Linux, and supports every CLI-based AI agent.
The multi-agent future is not coming. It is here. The question is whether your tools are ready for it.