Three tasks consume more time than anything else when setting up a VPS: configuring SSL certificates, pointing domains to your apps, and provisioning databases. Each one traditionally involves editing configuration files, running CLI commands, and debugging issues that only appear in production.
This guide walks through all three tasks using a visual approach that eliminates the manual configuration entirely. We will go from a bare VPS to a fully configured production environment with HTTPS, custom domains, and a running database in under ten minutes.
Prerequisites
You need two things:
- A VPS running Ubuntu or Debian – Any provider works. Hetzner, DigitalOcean, Vultr, Linode, AWS EC2, or any SSH-accessible server. A $5 plan with 1GB RAM is sufficient for most setups.
- Server Compass installed on your computer – Available for macOS, Windows, and Linux at servercompass.app. The free tier works for everything in this guide.
Once you have added your server to Server Compass (enter the IP, authenticate with SSH key or password), you are ready to start.
Part 1: Setting Up a Custom Domain
Step 1: Point Your DNS
Before touching your server, update your DNS records. In your domain registrar or DNS provider (Cloudflare, Namecheap, Route 53, etc.), create an A record:
Type: A
Name: @ (or your subdomain, e.g., "app")
Value: YOUR_VPS_IP_ADDRESS
TTL: 300 (or Auto)
If you want www to work as well, add a second A record or a CNAME pointing www to your root domain.
Step 2: Add the Domain in Server Compass
Open your app’s settings in Server Compass and navigate to the domain configuration. Click “Add Domain” and enter your domain name (e.g., myapp.com).
Server Compass performs automatic DNS verification before proceeding. It checks that your domain’s A record actually points to your VPS IP address. This prevents the frustrating scenario where you configure everything on the server side only to discover a DNS propagation issue an hour later.
Step 3: Configure Routing
Server Compass uses Traefik as the reverse proxy, which handles routing requests from your domain to the correct Docker container. This configuration is generated automatically – you do not need to write Traefik labels, Nginx server blocks, or Apache virtual hosts.
If you need www-to-non-www redirects (or vice versa), there is a toggle for that. URL redirects (301 or 302) can also be configured per domain without editing server configuration files.
Step 4: Security Headers
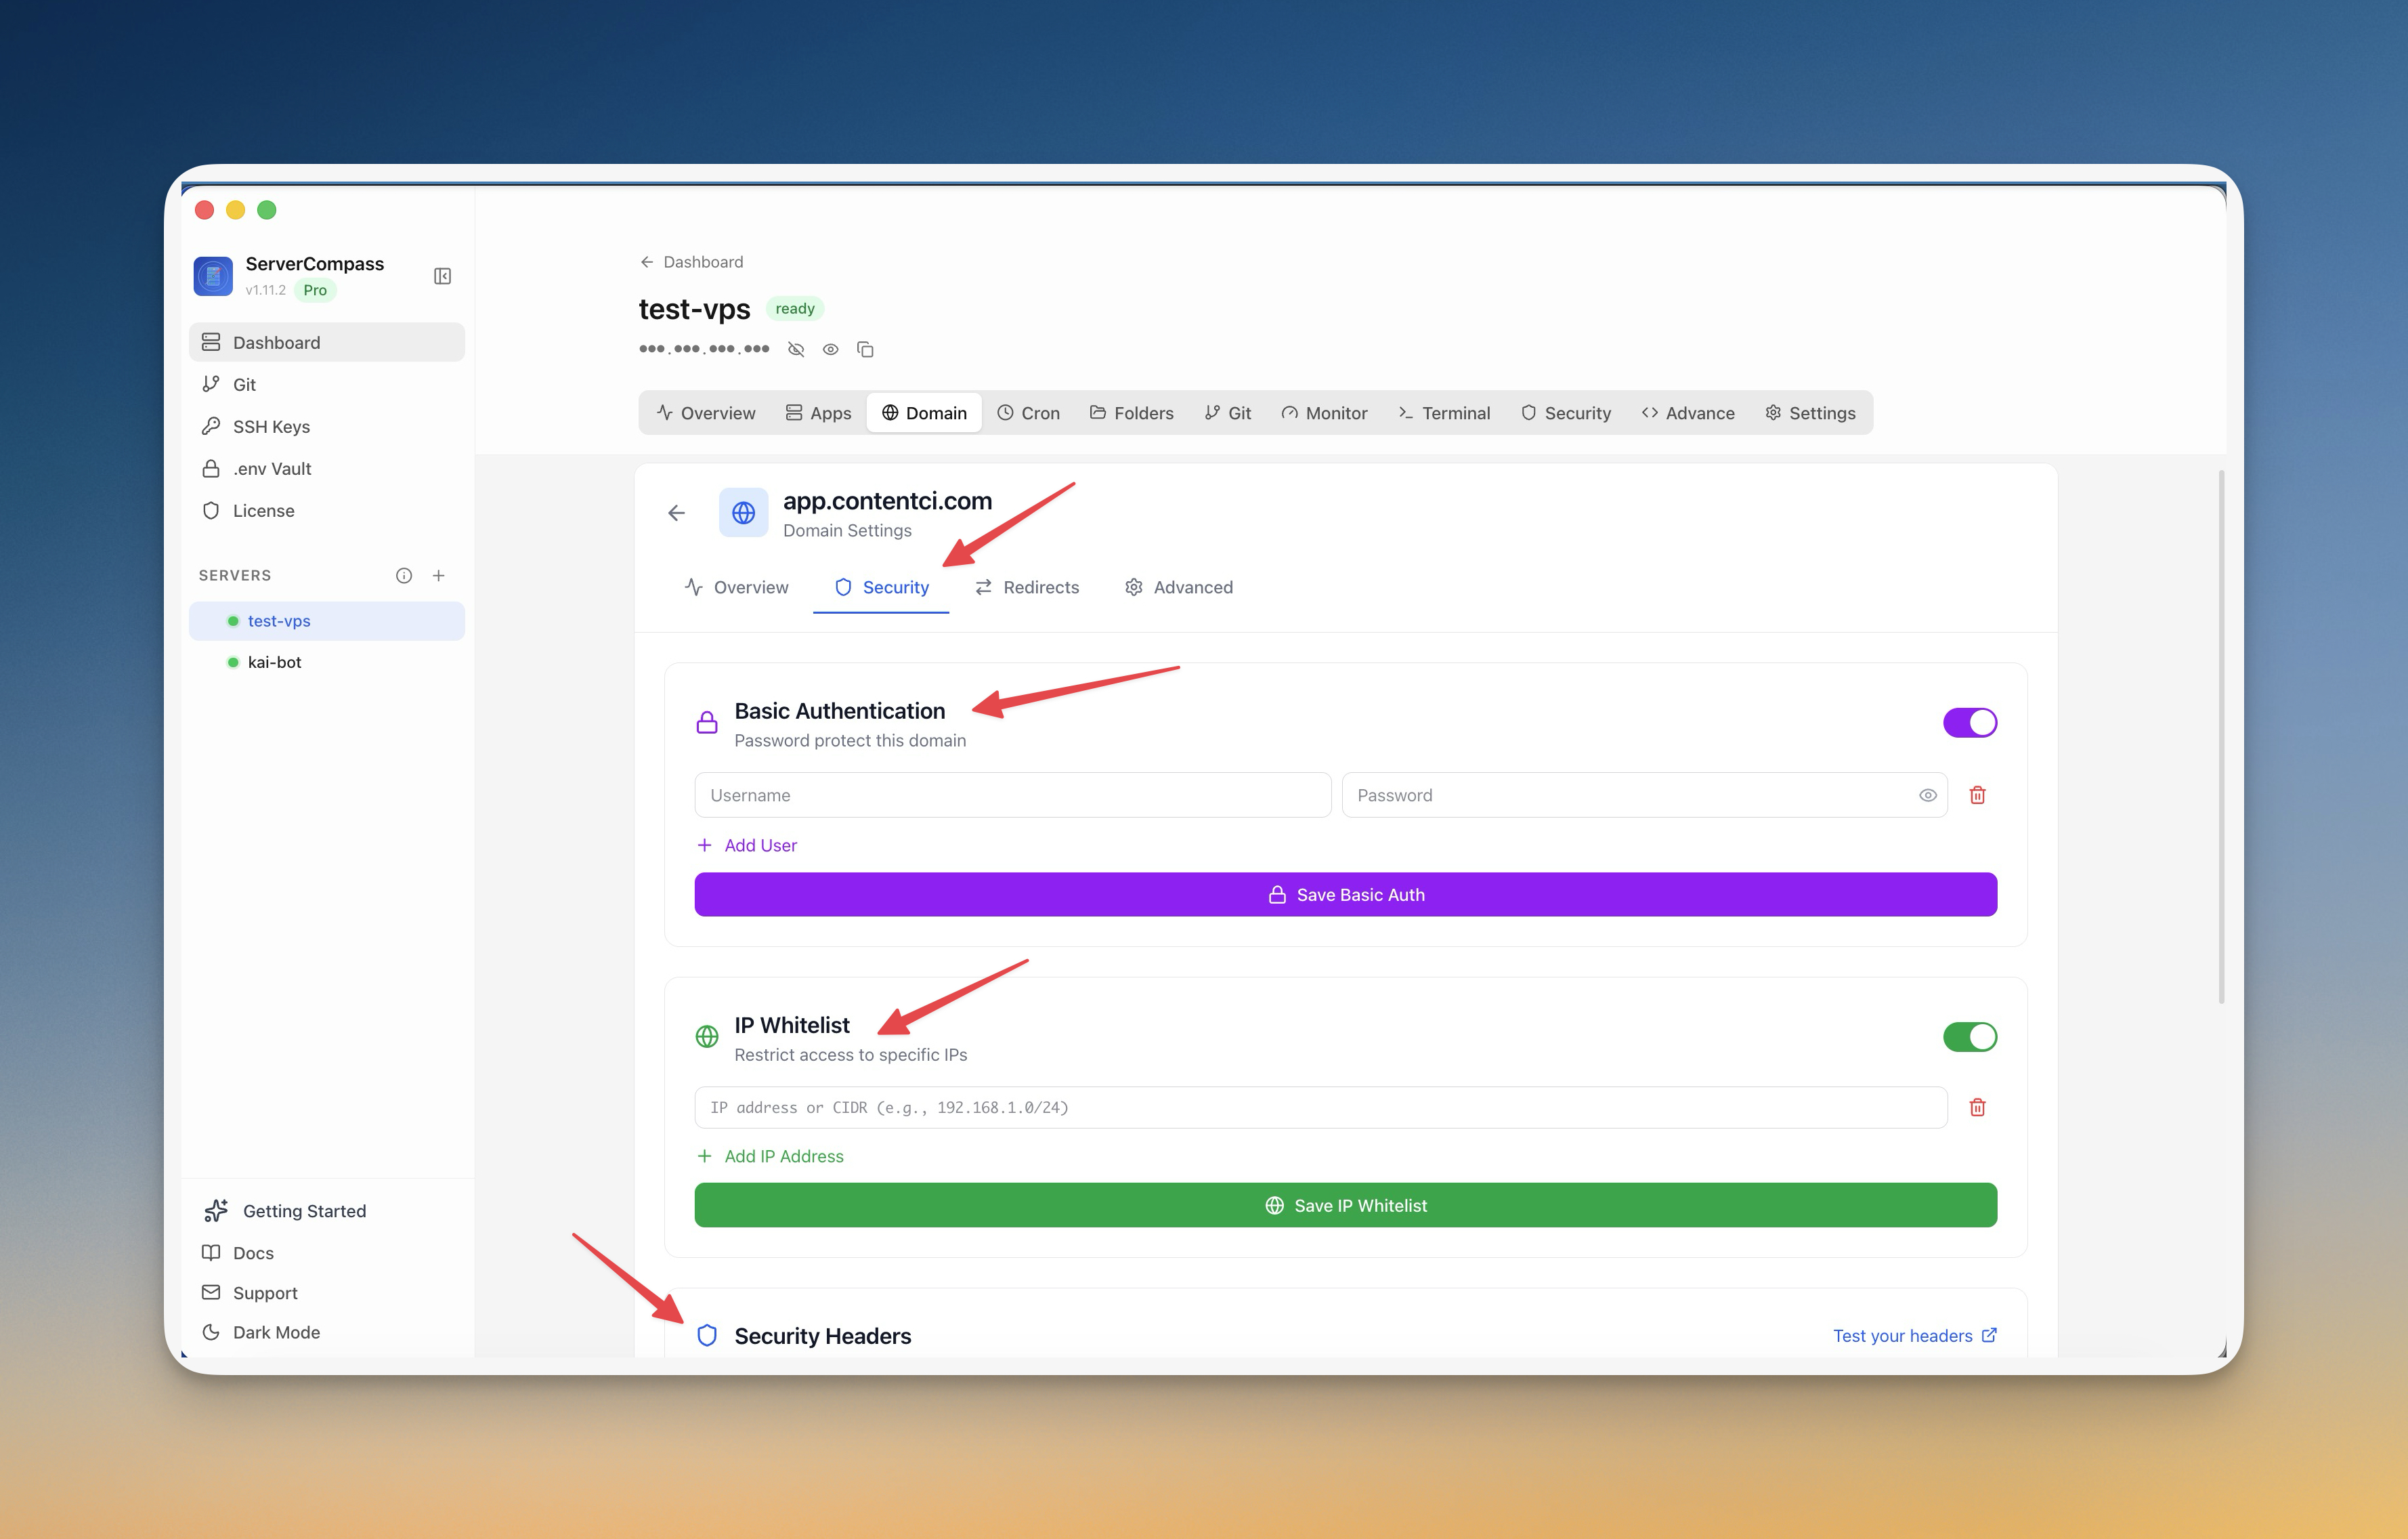
Once your domain is active, you can configure security headers directly in Server Compass. CORS policies, HSTS, X-Frame-Options, and other protective headers are available through a visual interface. These get applied at the Traefik level, so they protect your application regardless of what framework it runs on.
Part 2: SSL Certificates With Let’s Encrypt

Automatic SSL (The Default)
Here is the good news: if you added a domain in Part 1, SSL is already handled. Server Compass configures Traefik to automatically request and renew Let’s Encrypt certificates for every domain you add.
The process works like this:
- Traefik detects a new domain routing rule
- It requests a certificate from Let’s Encrypt using the HTTP-01 challenge
- The certificate is stored and automatically renewed before expiration
- All HTTP traffic is redirected to HTTPS
You do not need to install Certbot, configure cron jobs for renewal, or manually edit Nginx SSL directives. It just works.
Verifying Your Certificate
Server Compass includes a certificate viewer that shows you the full details of your SSL setup: the issuing authority, expiration date, certificate chain, and whether the certificate is valid. If anything looks wrong, you can trigger a manual renewal with one click.
Using Cloudflare Proxy
If you use Cloudflare’s proxy (orange cloud), Server Compass supports the “Trust Proxy Headers” feature. This configures Traefik to recognize Cloudflare’s forwarded headers so your application sees the real visitor IP instead of Cloudflare’s IP. Built-in presets exist for Cloudflare, AWS ALB, DigitalOcean, and Hetzner load balancers, with automatic rollback if the configuration causes issues.
Part 3: Deploying a Database
Option 1: One-Click Template Deployment
Server Compass includes pre-configured templates for every major database:
SQL databases:
- PostgreSQL, MySQL, MariaDB, SQL Server 2019
- Supabase (Lite), SurrealDB, TimescaleDB, Hydra
NoSQL databases:
- MongoDB (single instance and 3-node replica set), Redis, Valkey, KeyDB
- Elasticsearch, OpenSearch, CouchDB, Cassandra, ScyllaDB
Specialized databases:
- InfluxDB (time-series), ClickHouse (OLAP analytics), Weaviate (vector/AI)
- Meilisearch, Typesense (full-text search), Apache Kafka (event streaming)
To deploy one, open the templates panel, pick your database, and click deploy. Each template includes:
- Persistent storage – Data volumes are configured automatically so your data survives container restarts
- Sensible defaults – Memory limits, authentication settings, and configuration tuned for the VPS size
- Post-deployment steps – Guidance on initial setup, security hardening, and connecting your application
Option 2: Docker Compose for Custom Configurations
If the templates do not match your needs, Server Compass includes a full Docker Compose editor. Write or paste your compose configuration, and it handles the deployment, volume management, and network configuration.
Managing Your Database After Deployment
This is where Server Compass saves the most time compared to manual management. The built-in database management UI lets you:
- Run queries directly from the desktop app without installing pgAdmin, phpMyAdmin, or DBeaver
- Browse tables with a visual interface that shows schemas, columns, and data
- Import data from CSV files without writing SQL import scripts
- Export data for backups or migration
For quick administrative tasks, this eliminates the need for a separate database client entirely. For complex work, you can always connect your preferred client using the database credentials stored in Server Compass.
Putting It All Together: A Complete Example
Let us set up a Ghost blog with a MySQL database, custom domain, and SSL. Total time: about five minutes.
Step 1: Deploy Ghost from the templates panel. Server Compass deploys Ghost and MySQL together in a Docker Compose stack with persistent volumes and pre-configured environment variables.
Step 2: Add your domain (blog.mycompany.com) in the domain settings. Server Compass verifies DNS, configures Traefik routing, and provisions an SSL certificate.
Step 3: Open Ghost’s admin panel at blog.mycompany.com/ghost and complete the setup wizard. Your blog is live with HTTPS, running on your VPS, costing you $5/month instead of Ghost’s managed hosting at $25-199/month.
Step 4: Set up a cron job for database backups using the visual cron scheduler. Server Compass includes templates for common backup patterns, so you are not writing cron expressions from memory.
Common Gotchas and How to Avoid Them
DNS propagation delays: Server Compass checks DNS before configuring SSL, which prevents the classic “certificate failed because DNS had not propagated” issue. If the check fails, wait a few minutes and retry.
Port conflicts: If you already have Nginx or Apache running on port 80/443, Traefik cannot bind to those ports. Server Compass detects this during setup and guides you through resolving the conflict.
Database connection from your app: Your application container and database container share a Docker network. Use the service name (e.g., postgres or mysql) as the hostname in your database connection string, not localhost or your VPS IP.
Memory limits: Database templates include recommended minimum memory. PostgreSQL runs well on 256MB, MySQL needs 512MB, and Elasticsearch wants at least 2GB. Server Compass shows memory requirements before you deploy so there are no surprises.
Beyond the Basics
Once your core infrastructure is running, Server Compass handles the ongoing management that used to require manual SSH sessions:
- Monitoring tracks resource usage and alerts you before problems escalate
- Container logs stream in real-time to your desktop for debugging
- Rollback restores any previous deployment version with one click
- Environment variable management lets you update secrets without redeploying
The goal is straightforward: everything you would normally do in a terminal, done through a visual interface on your desktop, without installing anything extra on your server.
Server Compass is available for macOS, Windows, and Linux with a free tier to get started and a $29 one-time license for the full feature set.